Creating an Encrypted Emergency Backup Drive
Redundancy and Disaster Recovery are topics that really interest me, it's important both in a work and personal environment. Losing data is not fun.
When it comes to my data I don’t want to take any chances, I want to make sure that if disaster happens I am prepared, and have a disaster recovery plan in place. I will perhaps share a guide on creating a personal disaster recovery plan in the future.
But for now, I am going to focus on the idea of having a portable backup of your most important data, this could be important documents, backups of your password manager, photos, etc. Basically data that if lost, it would cause significant stress and problems. This is a backup that you will pretty much take everywhere with you, or at least store in a safe place away from your home, possibly even another country.
This may seem overly paranoid but in my opinion it’s good practice, and planning for the worst case scenario has no downside. Hopefully it will never be needed, and you can remain the weird overly paranoid family member!
Anyway, lets begin!
Step 1 -
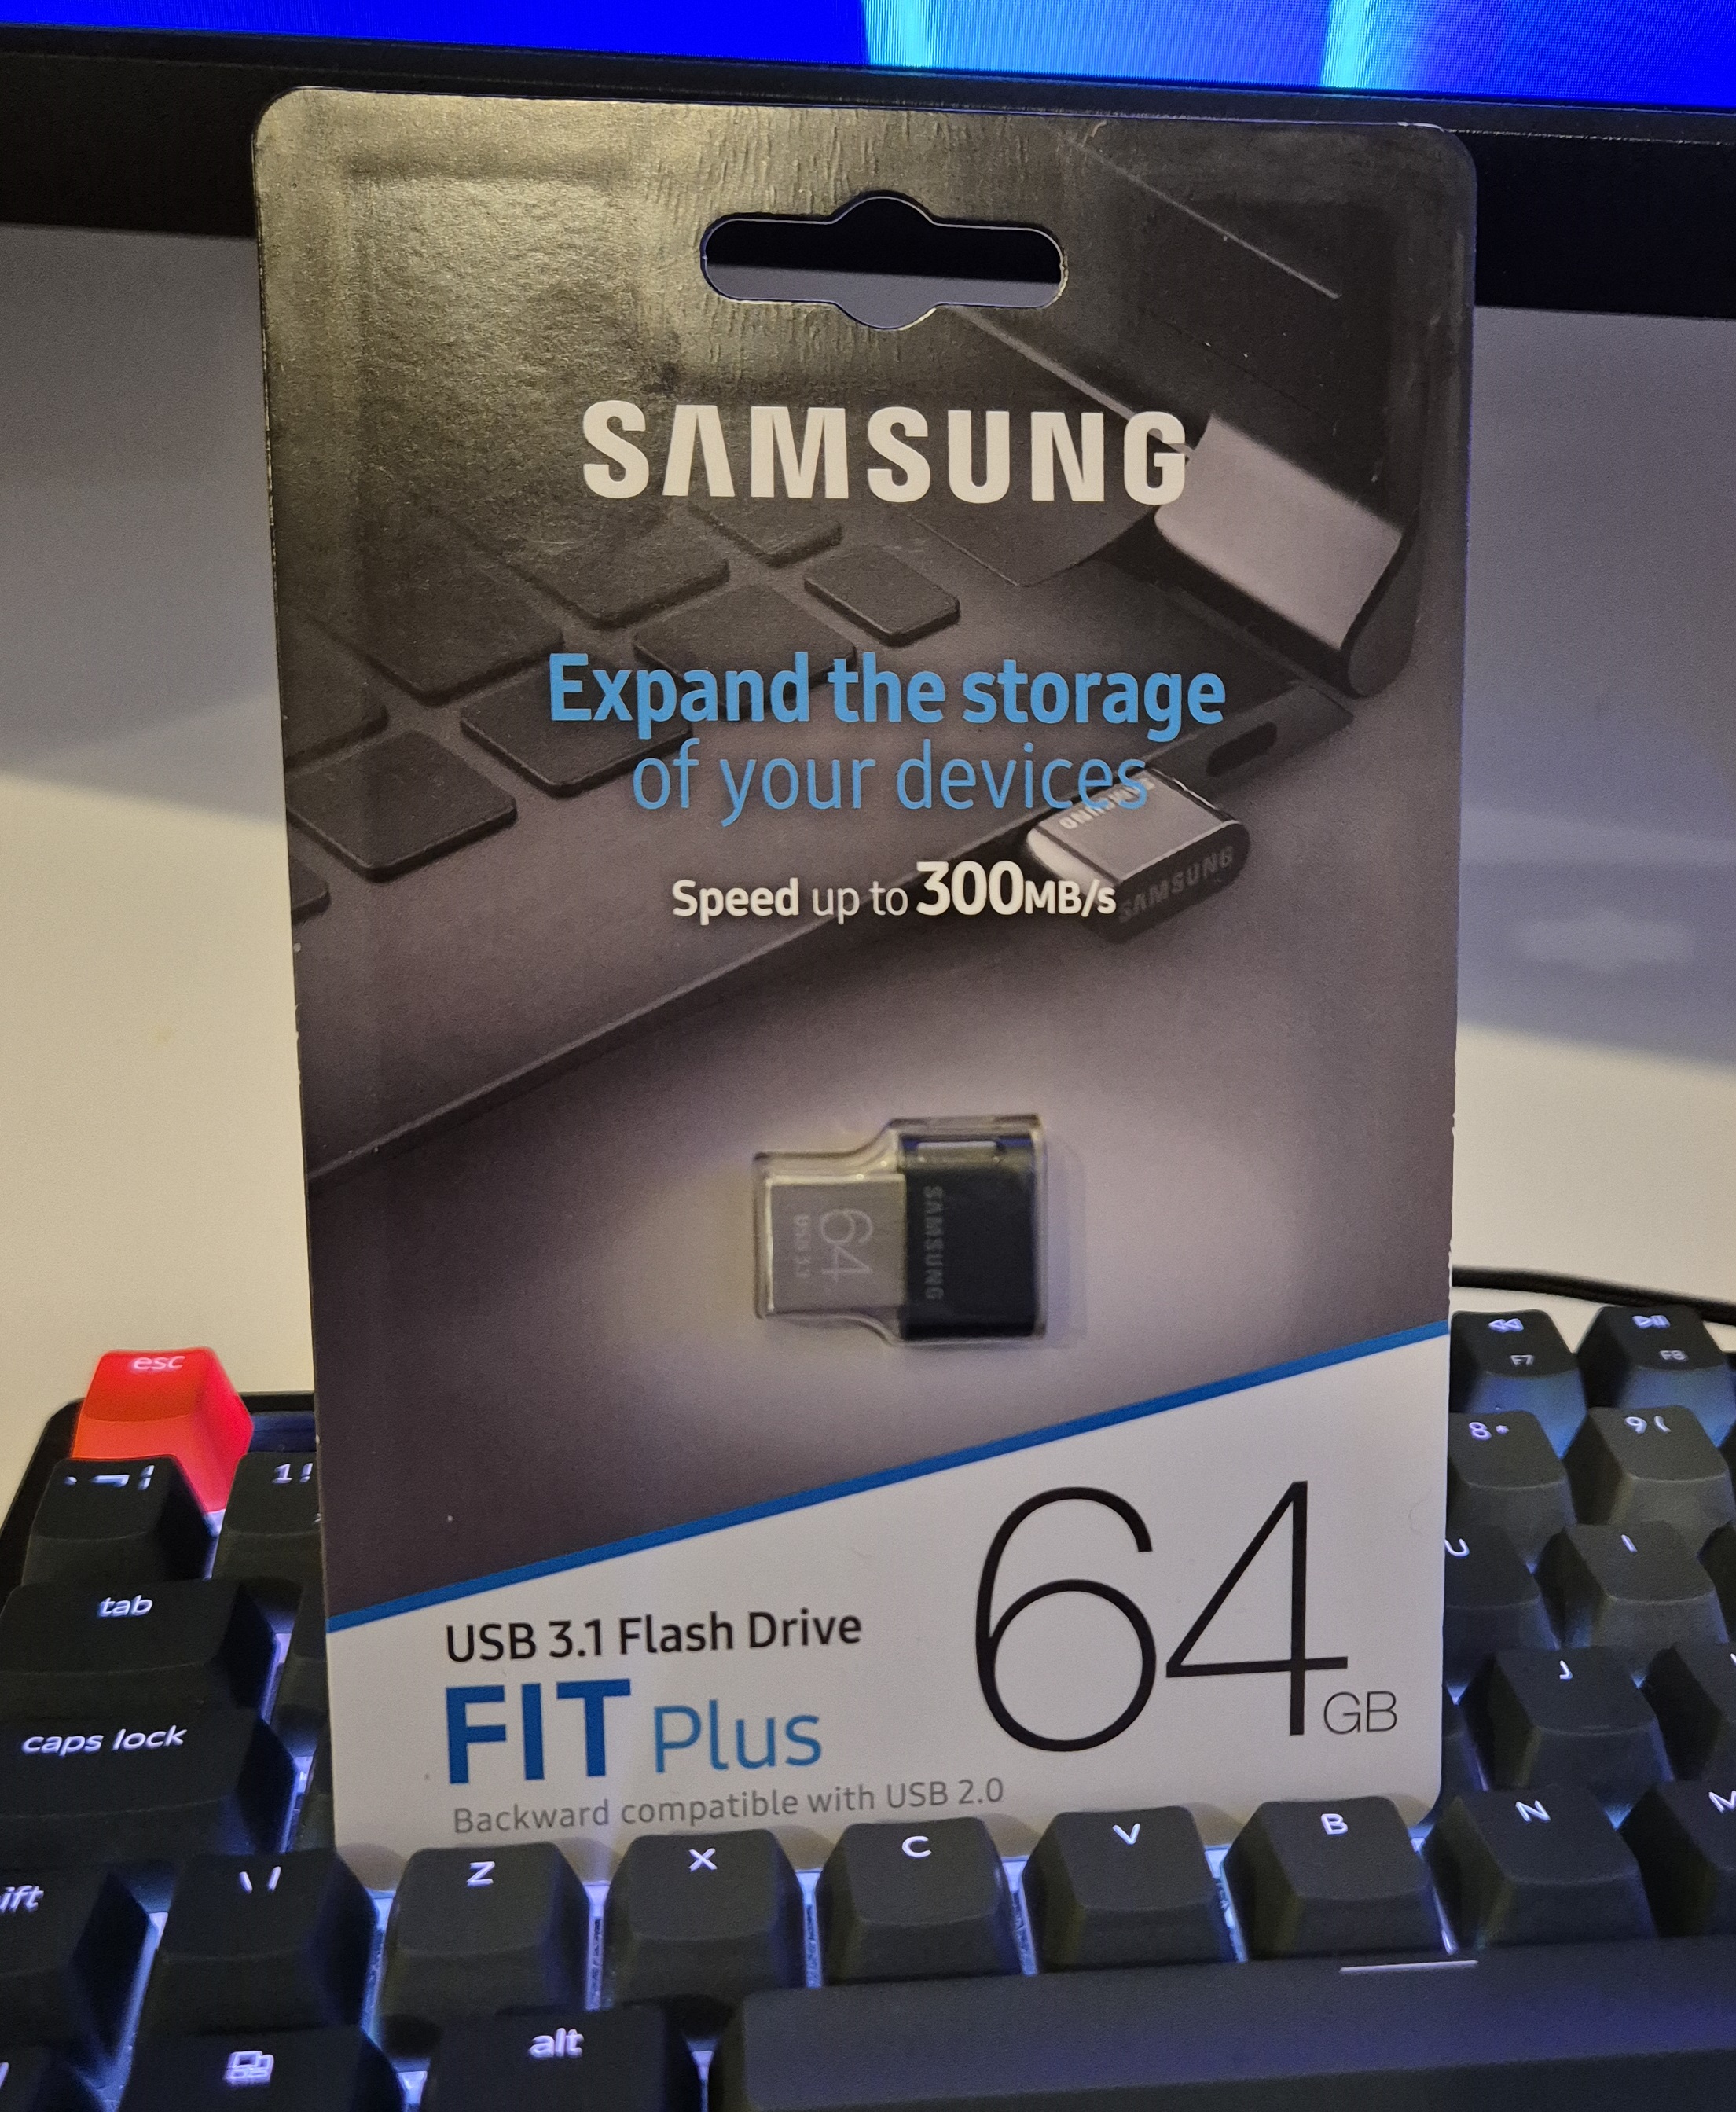
Your first step is to find a suitable portable storage media. This is mostly personal preference, I was using a 16GB USB drive, however I have now swapped to this 64GB Samsung FIT Plus as it’s tiny, lightweight, and built well enough to withstand daily wear – also I got it very cheap.
You could choose to use a Micro SD card, although these are generally seen as less reliable, but they can fit behind a phone case or in other small covert spaces.
64GB is way more than I need, but this is going to be different for everyone, you might plan on keeping a lot more on there than I am.
You may want to format the drive first, but not required, you can create the encrypted volume alongside your existing data.
Step 2 -
Download VeraCrypt from here - https://veracrypt.fr/en/Downloads.html
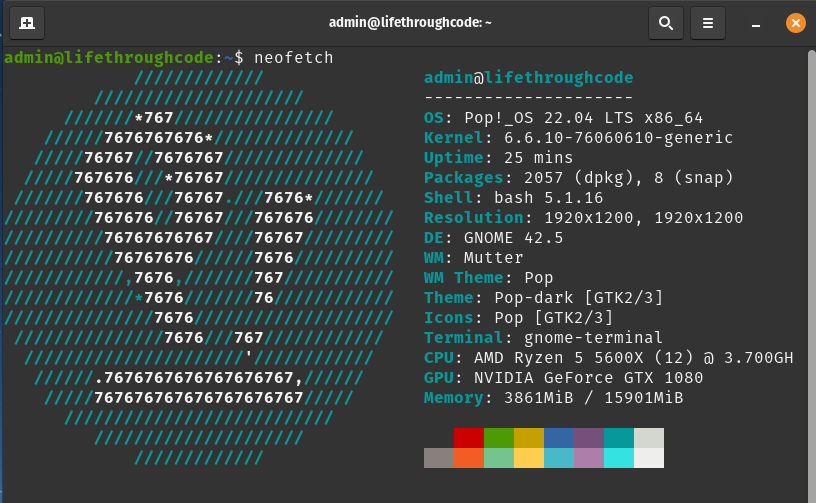
Of course you need to download the correct version for your operating system, I am going to be doing this in POP!_OS, for Windows/macOS there are limited options, but for Linux you will need to check your version and download the corresponding package.
You can check your version in ‘Settings’ then ‘About’ usually. As you can see I am using Pop!_OS 22.04 LTS.

Or if you like to be fancy you can use neofetch (sudo apt install neofetch).
Therefore I am going to download this package, you will want to download the correct one for your OS -
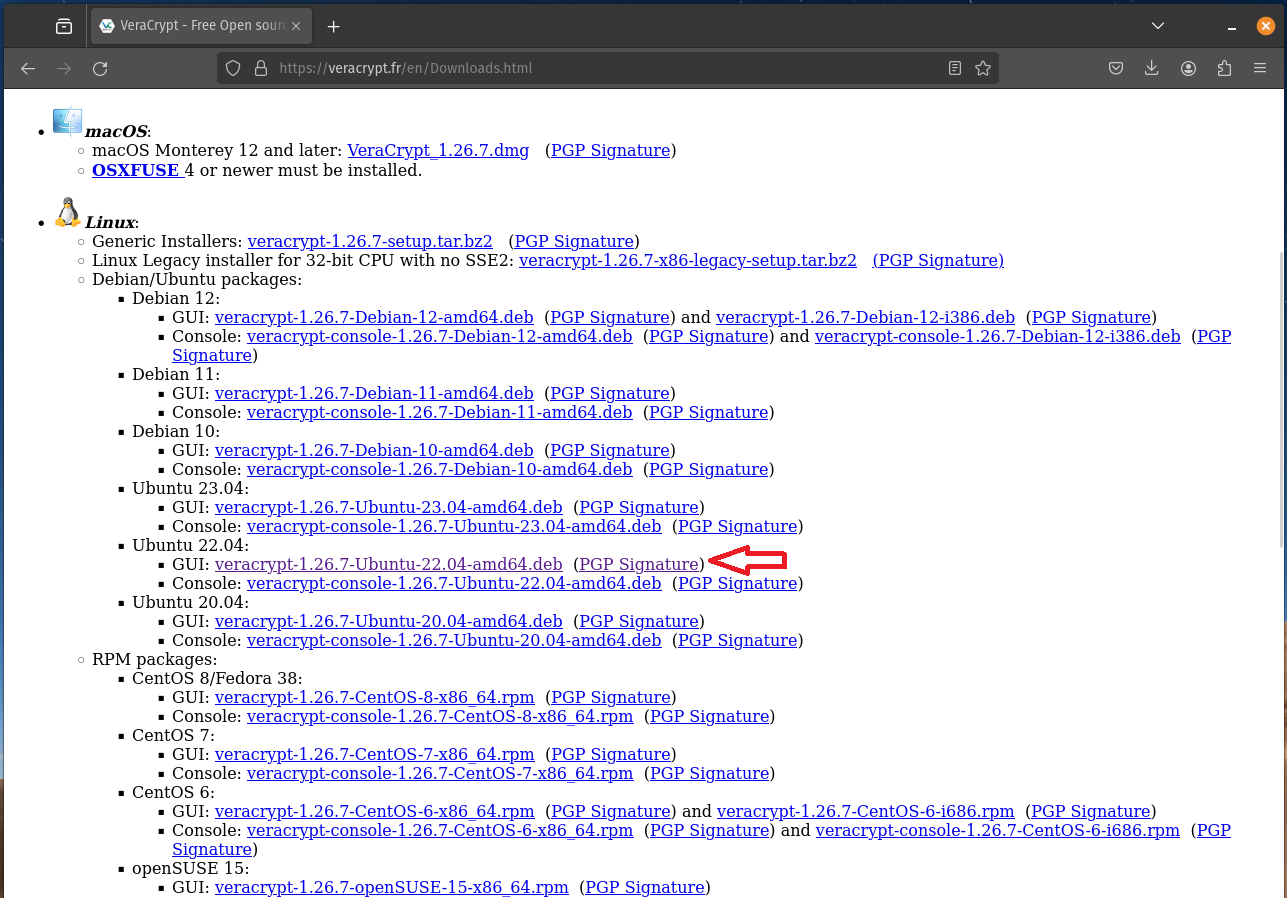
Make sure to also download the PGP Signature next to it as you will need this to verify the package.
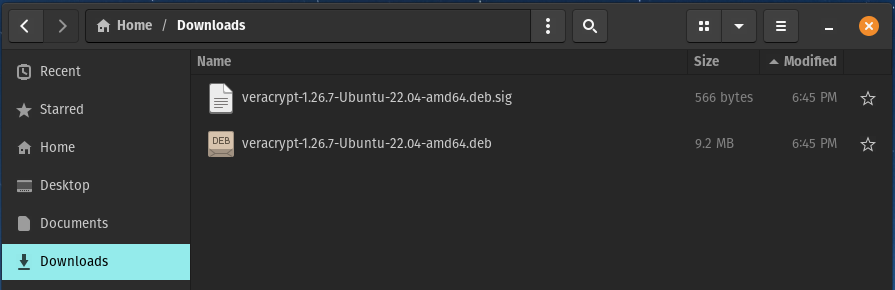
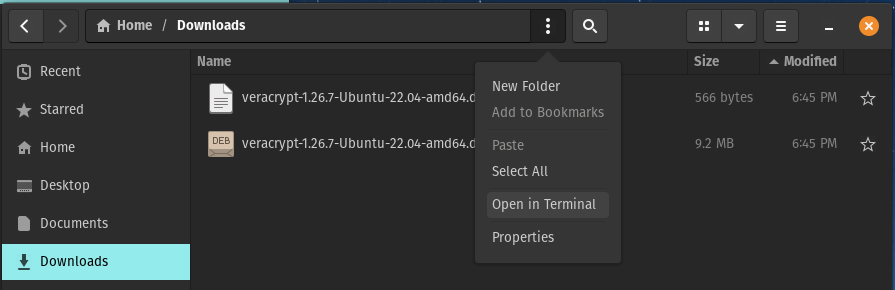
In your Downloads folder you should now have the following 2 files -
Do not install the package yet, it’s recommended to verify the package first, and as this is being used for such important data you really want to make sure.
“It might happen that a VeraCrypt installation package you download from our server was created or modified by an attacker. For example, the attacker could exploit a vulnerability in the server software we use and alter the installation packages stored on the server, or he/she could alter any of the files en route to you.
Therefore, you should always verify the integrity and authenticity of each VeraCrypt distribution package you download or otherwise obtain from any source. In other words, you should always make sure that the file was created by us and it was not altered by an attacker. One way to do so is to verify so-called digital signature(s) of the file.”
Step 3 -
Open the terminal point it to your Downloads folder.
Either by clicking on the 3 dots while inside the Downloads folder and selecting ‘Open in Terminal’.
Or from a terminal type cd Downloads and press enter.
Now run the command wget https://www.idrix.fr/VeraCrypt/VeraCrypt_PGP_public_key.asc
This will download the VeraCrypt public key to your Downloads folder.
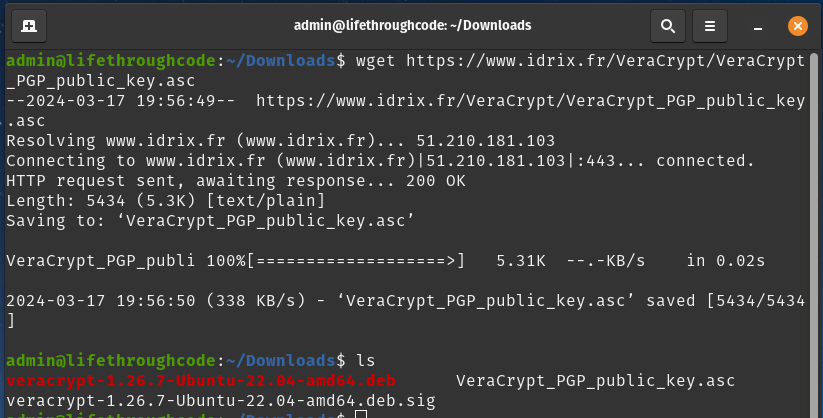
I have run the command and it’s downloaded the public key, and I have confirmed it’s in my Downloads folder by running ls. You can see VeraCrypt_PGP_public_key.asc in there, as well as our previous 2 files.
Now you want to run the following command (our terminal still needs to be pointing at Downloads) - gpg --show-keys VeraCrypt_PGP_public_key.asc
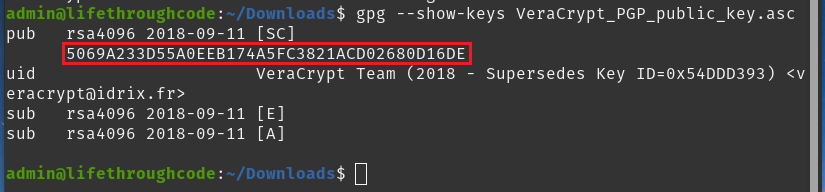
We need to pay attention to the code highlighted -
5069A233D55A0EEB174A5FC3821ACD02680D16DE
Go to the VeraCrypt Downloads page again, and scroll to the bottom of the page, you will see this -
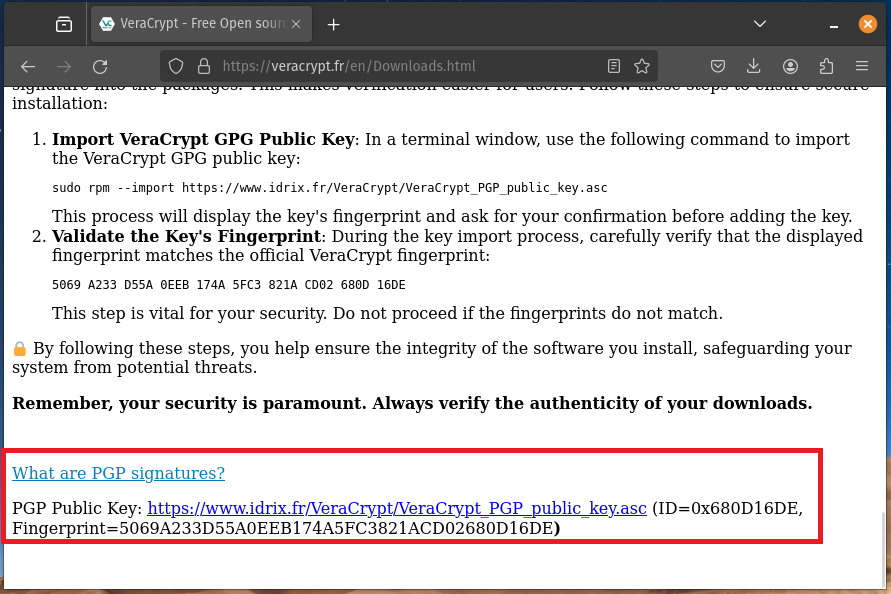
You want to take the code from your terminal and make sure it matches the Fingerprint from the VeraCrypt website.
Code from terminal -
5069A233D55A0EEB174A5FC3821ACD02680D16DE
Fingerprint from VeraCrypt website -
5069A233D55A0EEB174A5FC3821ACD02680D16DE
As you can see these 2 codes match, which means we are safe to proceed.
If the codes do not match do not continue with the install, delete the package and maybe ask in the VeraCrypt forum for additional advice on downloading a safe copy of the package.
Step 4 -
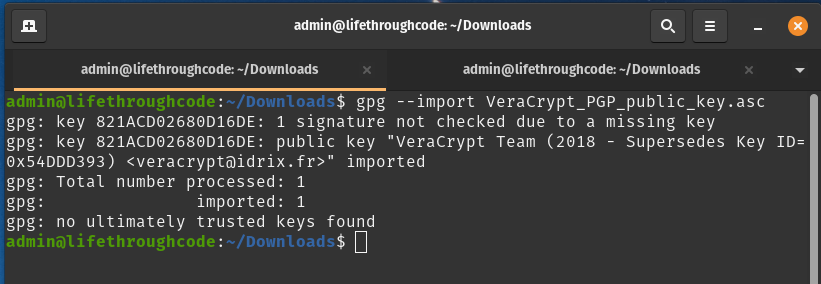
Once we have verified the key matches, we can now import the public key -
gpg --import VeraCrypt_PGP_public_key.asc
With the key imported, we now want to verify the signature of the package using the .sig file we downloaded earlier.
To do this we need to run the following, you will of course need to modify to match the filenames for your version.
gpg --verify veracrypt-1.26.7-Ubuntu-22.04-amd64.deb.sig veracrypt-1.26.7-Ubuntu-22.04-amd64.deb
We are first pointing at the signature (.sig), and then putting a space and then pointing at the package (.deb).
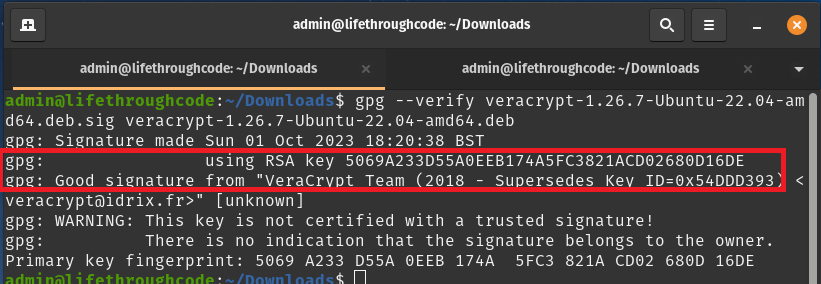
All being well you should get the same as above, check the RSA key matches the fingerprint we got earlier, and that you get ‘Good signature from VeraCrypt Team’.
The process for Windows is slightly different and you will need to use something like gpg4win.org
Step 5 -
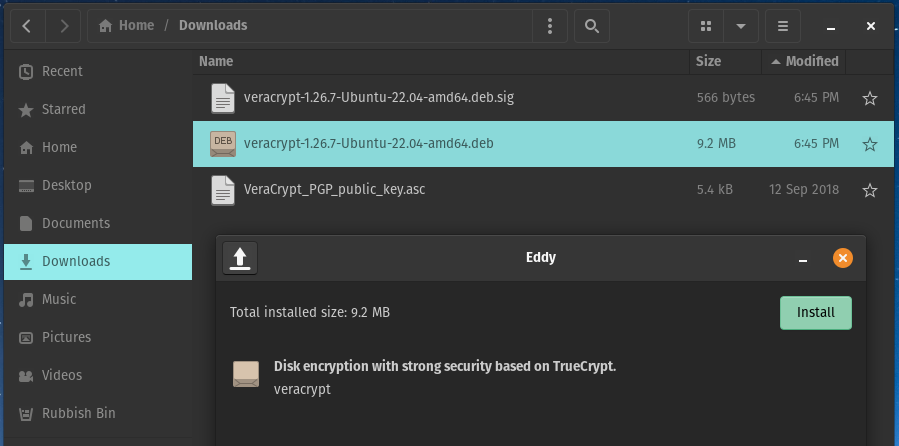
You can now install VeraCrypt – finally!
This can be done by double clicking on the .deb file and installing via your package manager, in my case this is Eddy which is the default for Pop!_OS and this is how I am going to install the package.
You can also install via the terminal using sudo dpkg -i veracrypt-1.26.7-Ubuntu-22.04-amd64.deb.
Once finished you can now find VeraCrypt and open it from your Applications menu.
Step 6 -
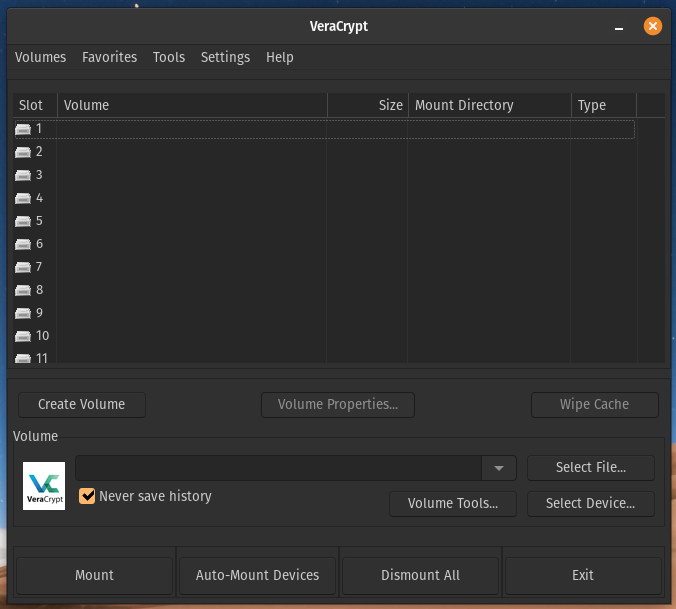
Once opened you will need to plug your drive in if not already done.
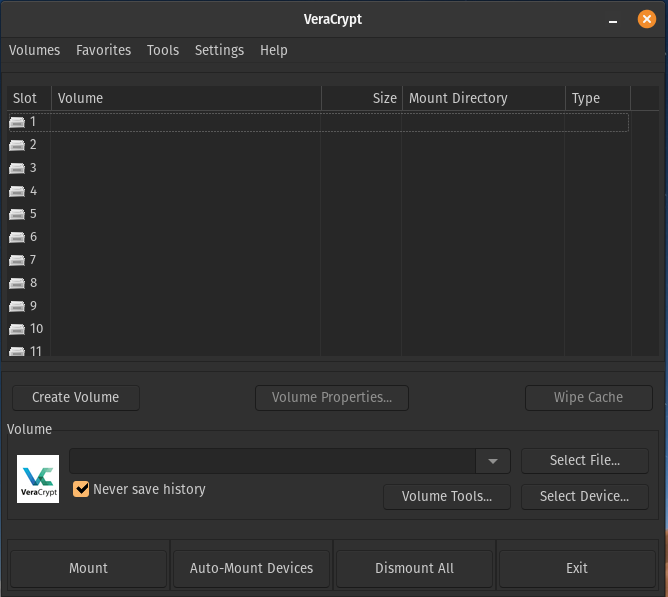
Now click on ‘Create Volume’.
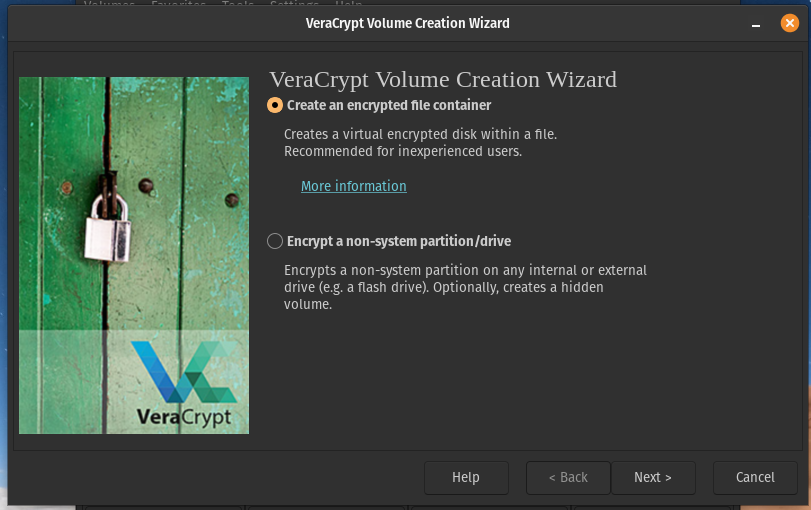
We only want an encrypted container, so leave on default and press next.
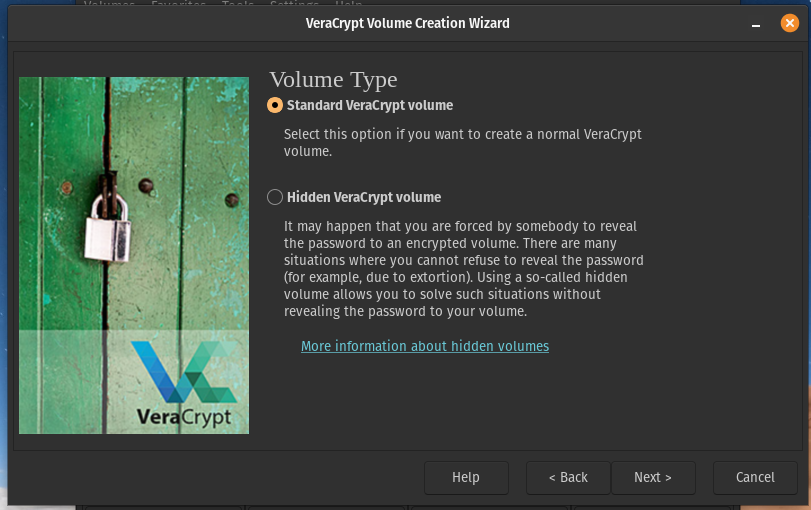
I am going to leave this on standard for this tutorial, but you can use a hidden volume if you wish. Click Next.
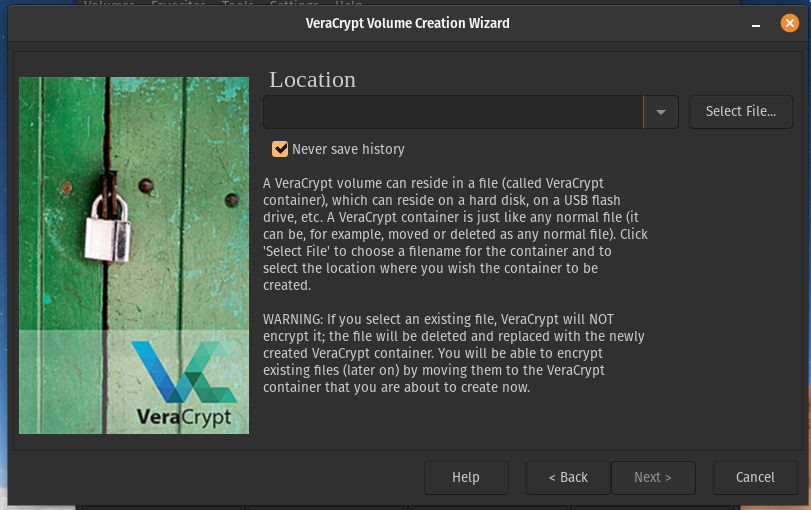
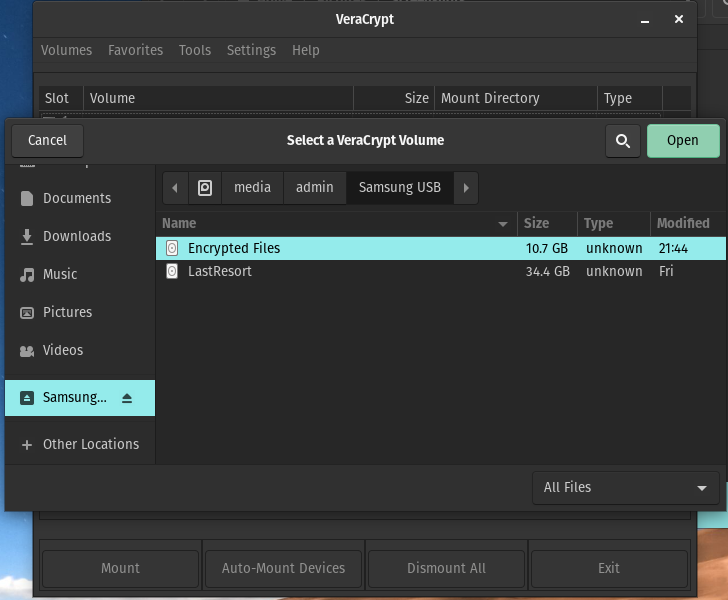
Now you want to click ‘Select File…’ and look for the USB drive you plugged in.
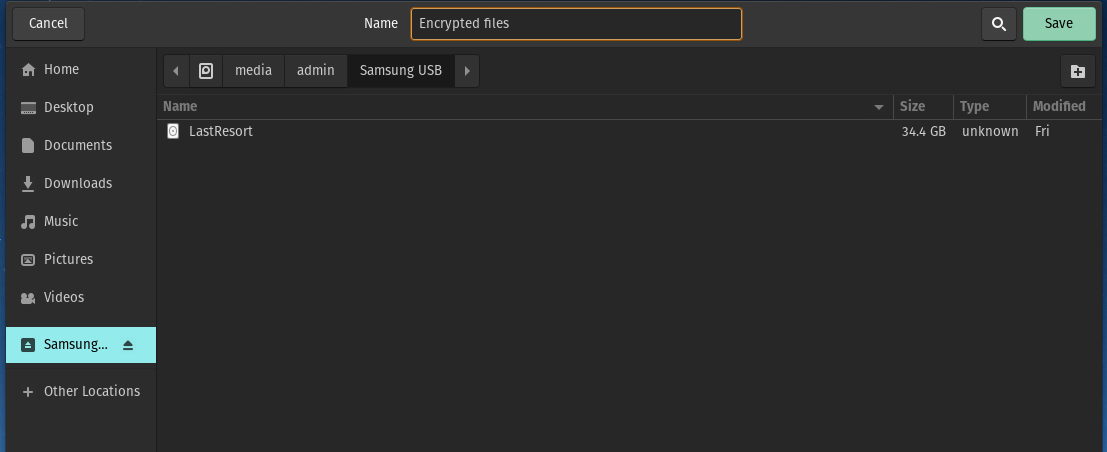
As you can see I have selected my Samsung USB, and at the top in the Name field I have typed what I want my encrypted volume to be called, for now I will just call it ‘Encrypted files’.
Once you have done this click on ‘Save’.
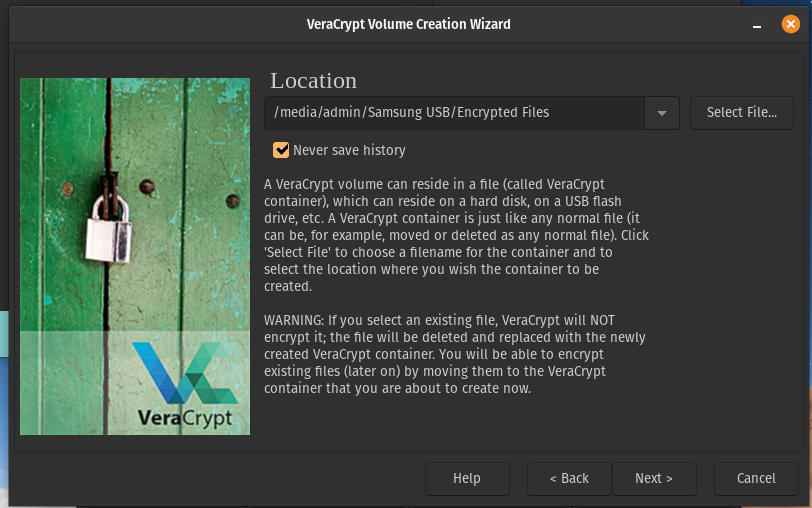
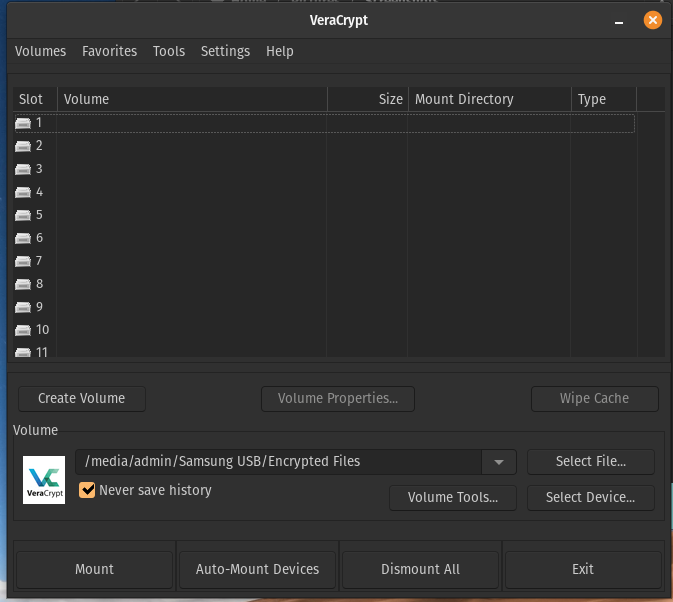
As you can see the location is now pointing to the Samsung USB with the volume name that we set in the previous window. Click Next.
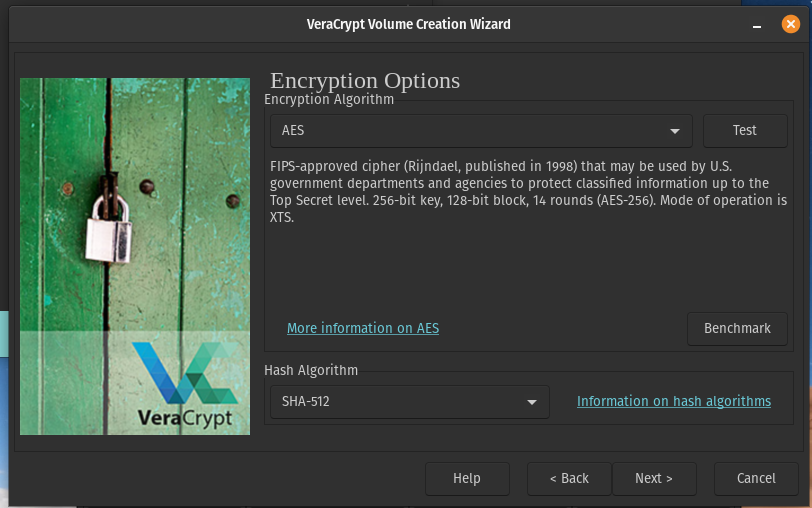
I am going to stick with using the default AES Encryption with the SHA-512 Hash, which should be fine for pretty much all use cases.
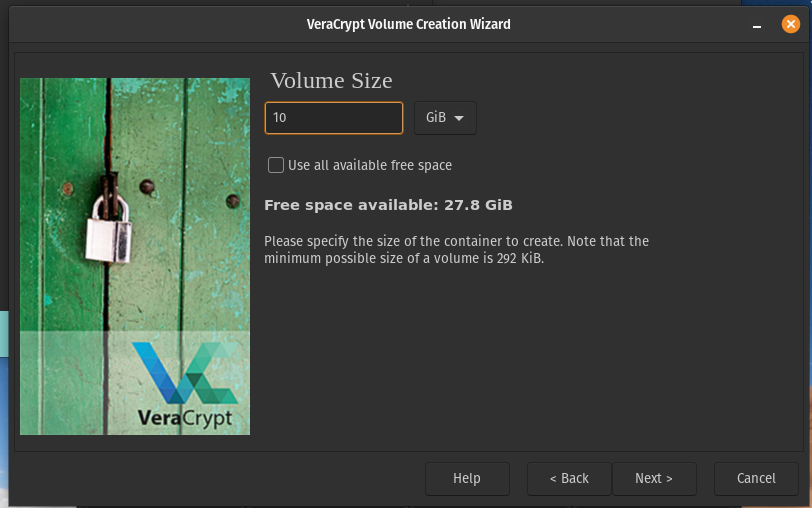
Set the size you want your encrypted volume to be, I’m going to use 10GB for this tutorial, but you want to set it to a sufficient amount for the data you will be storing. You can still use the remaining space available as non encrypted, or you can create several volumes on the USB perhaps for different data.

Set a strong password here (no Password123 is not strong).
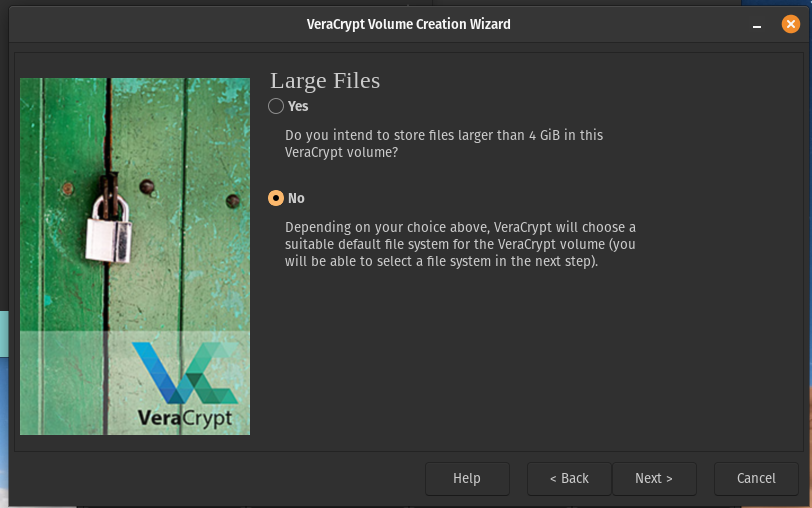
This is dependent on you and the size of files you plan to store.
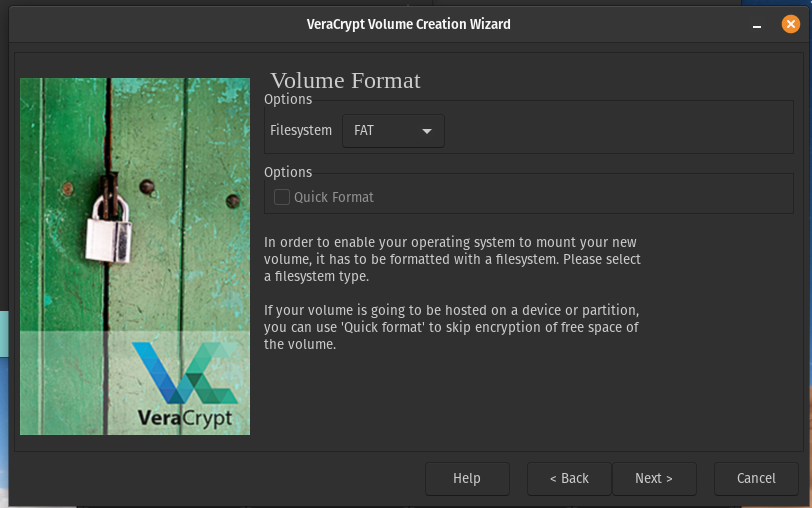
Choose a Volume format, FAT should be suitable for most use cases.
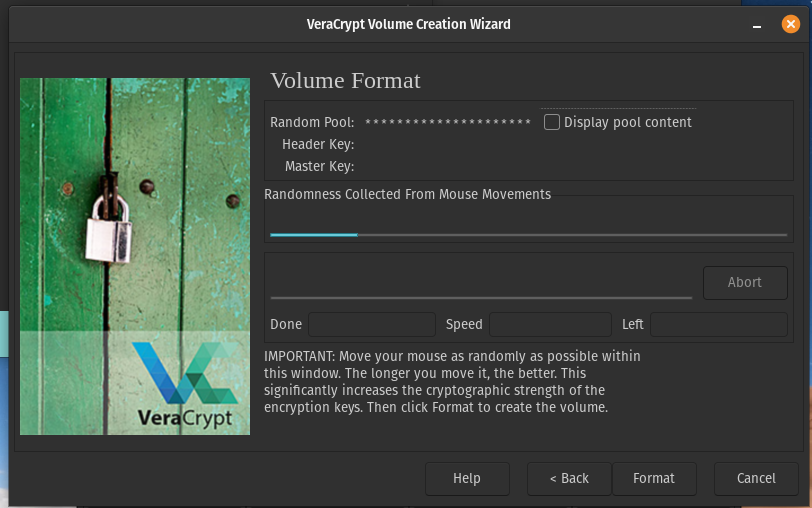
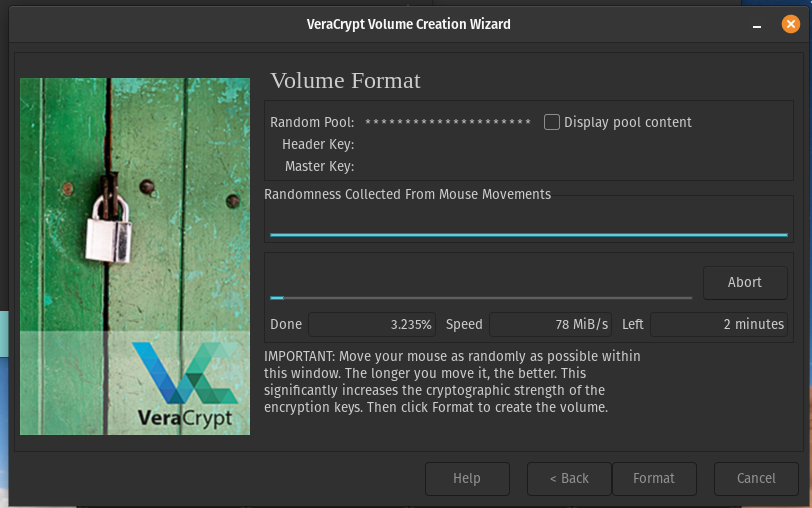
Now make random movements around the window with your mouse to increase the cryptographic strength of the encryption keys. I am going to keep moving the mouse until the blue bar is full.
Then click Format.
All done!
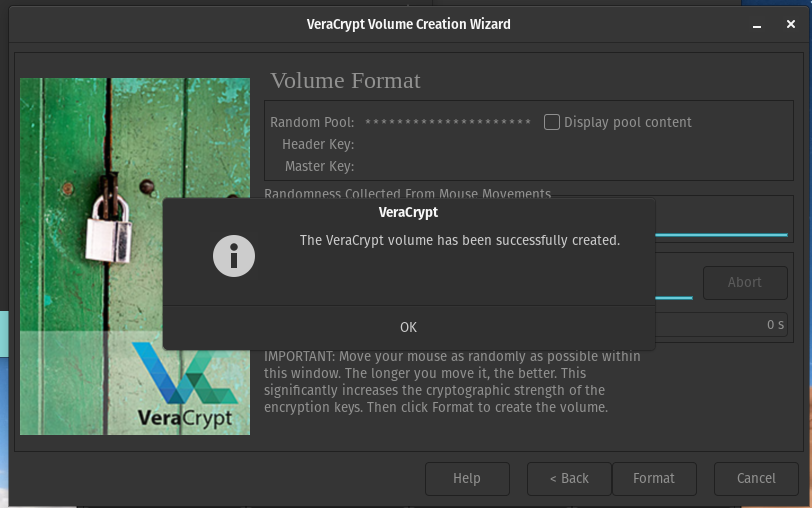
You can now press OK and close the VeraCrypt volume format window.
Now to access your encrypted volume, click on ‘Select File…’
Find and select the encrypted volume you just made and then click ‘Open’.
You can see here the path under Volume has updated check this is correct, now select a slot, you can click on slot 1 to highlight it, then click ‘Mount’.
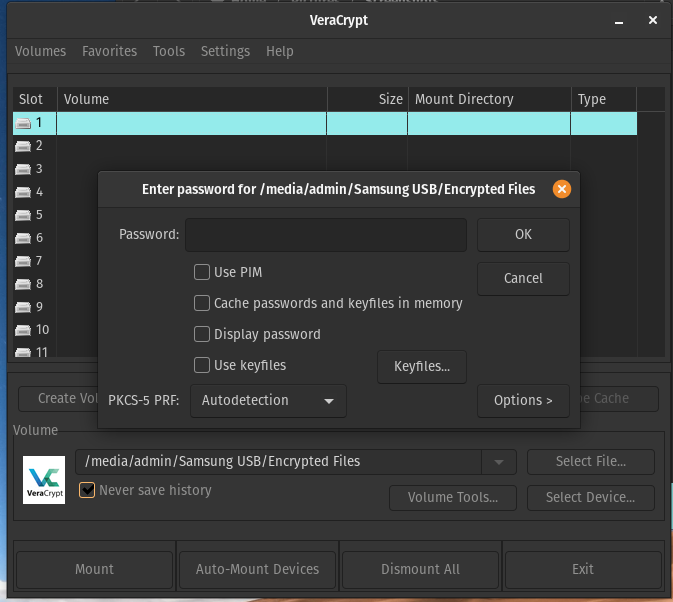
Enter your password and click OK. You may also be prompted to enter your computer password to elevate the permissions.
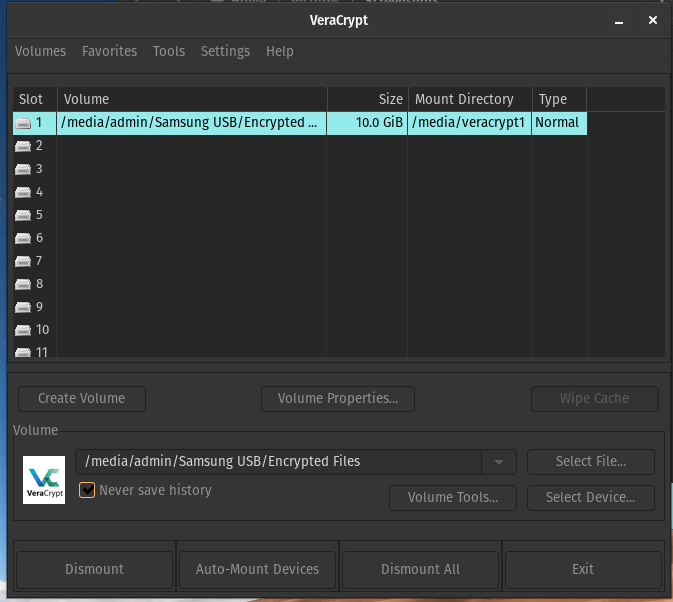
Once done you will see Slot 1 now has your volume path on it, and other details.
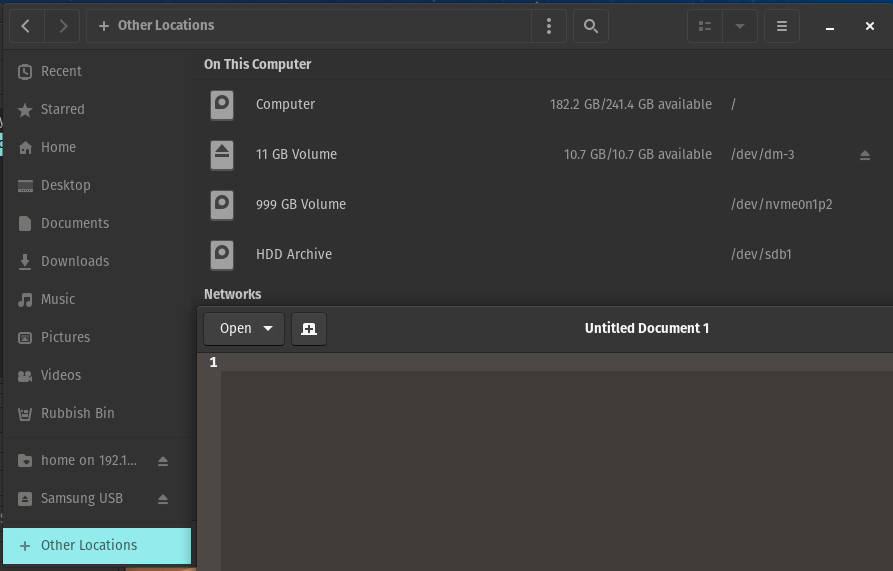
You can double click on Slot 1 to open up the volume in your file explorer, or you can access it via ‘Other Locations’.
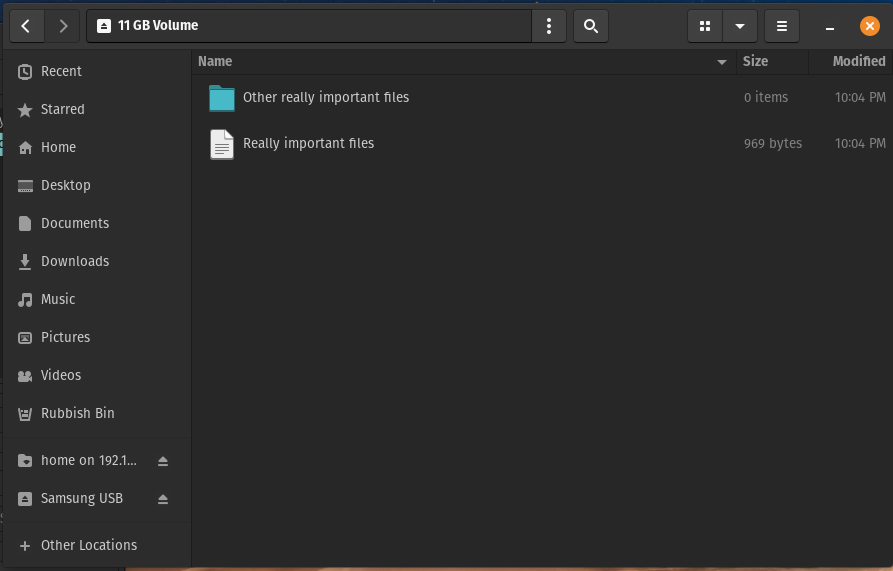
Save the important files you want secured in your encrypted volume once mounted.
Once done you can go back into VeraCrypt, select Slot 1 and then click ‘Dismount’. This will then dismount the encrypted volume and you’ll need to mount it and enter the password again to access.
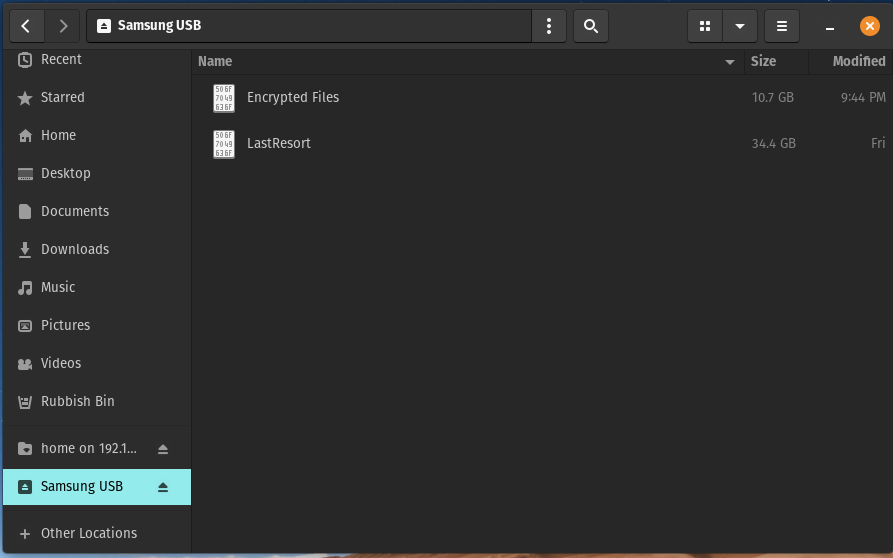
This is what the contents of the USB will look like when someone plugs it into a computer, it’s completely inaccessible to anyone else, and you could even rename the encrypted volume to something less obvious.
Then when you need to add or update the contents just plug it in, mount it using VeraCrypt and enter your password, then save the files you need and unmount it again.
You can now unplug the USB as usual and store it in a safe place, on a key chain, or even on a necklace.
Hopefully this helps, and inspires you to think about taking more steps to protecting your data.
Until next time!